This is my first official “metal casting blog post.” It’s been a small hobby of mine since February of 2019, and I’ve only shared some pictures on Facebook/Twitter, but I’ve decided I’m going to be more intentional about chronicling my projects on my personal blog.
A while back, I saw a really neat video on YouTube where the author created a look of embossed metal letters against a mahogany wood block: https://youtu.be/15cE1SfwlQo?t=1019
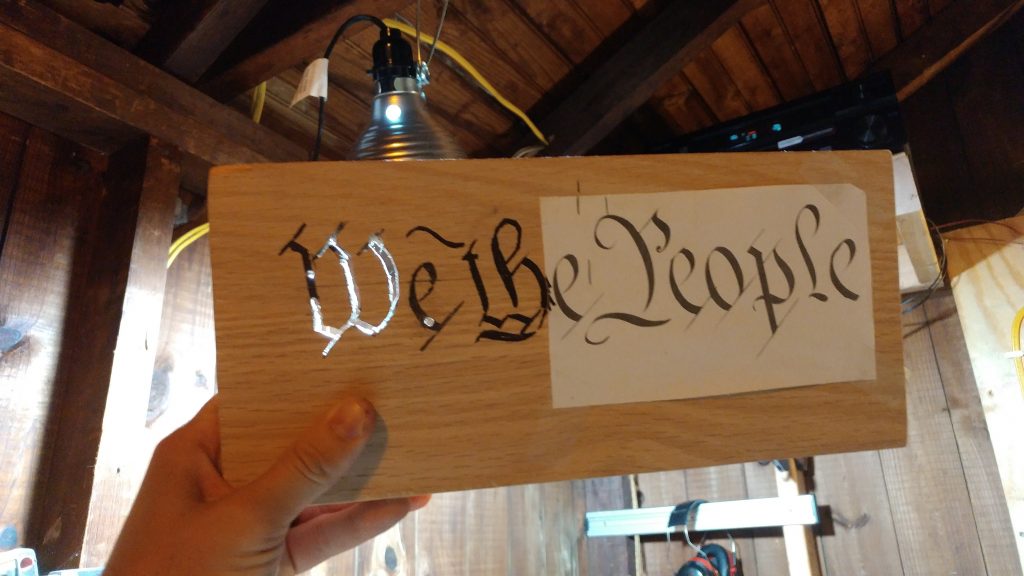
After some time, I realized this would be a really neat technique to use for hand-crafted gifts. My dad loves “all things constitution,” so the idea began to create a plaque proclaiming “We The People” in this charred-wood-embossed-metal-style.
I went to the nearby hardware store to pick up a nice piece of oak; I printed out an authentic-looking rendition of the words, and got to work.
My first challenge was transposing the printed text onto the oak board. I first tried using a Sharpie marker to “trace” the text, and follow it with a hacksaw:
This process was really really slow and laborious, so brainstormed a bit to figure out how to make this go quicker. I ended up using my table saw to “thin-out” the sections of the (originally 3/4″ thick) board down to about 1/4″:

I also picked up some new wood-cutting bits for my Dremel and was able to make quick work of the remainder of the text (also without needing to first “transpose” the printout via Sharpie to the face of the wood).
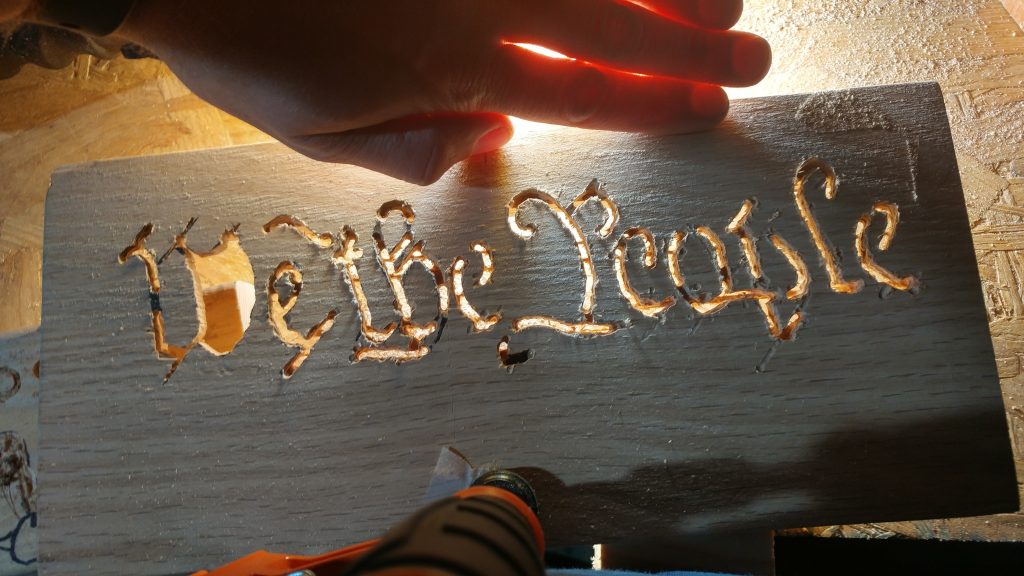
I did make a small mistake here – I didn’t consider the need for “inner-letter support” (take a look at the inner section of the “W”); I’m chalking that up to “lessons learned.” I wasn’t too concerned with this at first, since the next phase of the project should have provided a degree of “masking” over this mistake.
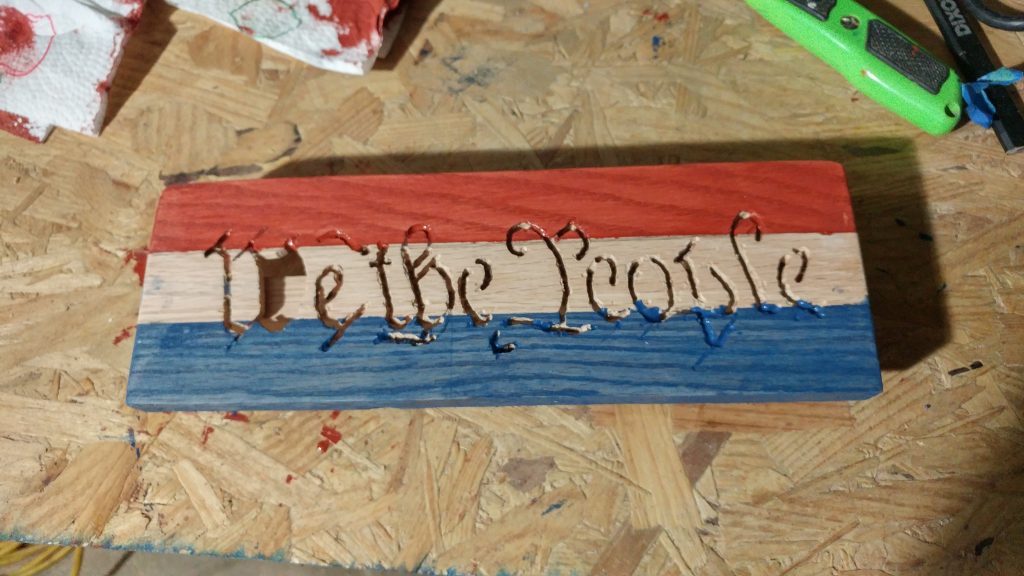
After completing the cutouts (and proving to myself that I was capable of actually representing the text fairly accurately), I wanted to add some color: Red and Blue (thinking that the light colored wood would infer a “white” stripe. I found some water-based stain on Amazon (Minwax Red and Blue) that provided the colors I was looking for:
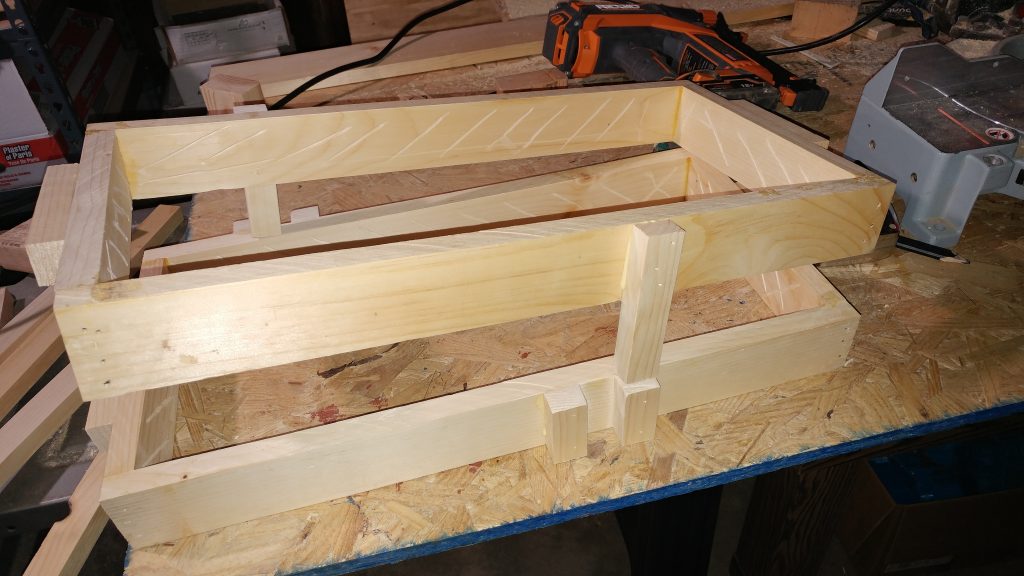
Next, I had to create a new “flask” to facilitate a sand-mold of this size (all my previous sand casting have been much smaller). So I constructed a new cope (top) and drag (bottom) with keyed alignment posts to ensure both sides would align after being separated and joined. I also added grooves to the inner faces of the flask so that the ptreobond sand would have some surfaces to grab onto.
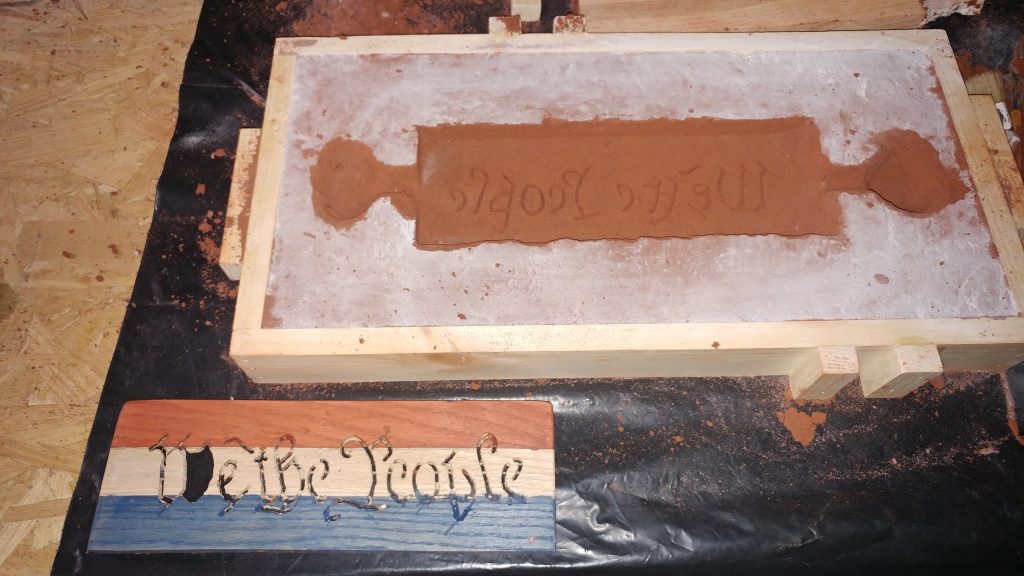
After building the flask (and ordering more petrobond to account for my newly expanded flask), I packed the sand around a non-cutout replica of the plaque (since I wanted the metal to “fill in” the back section of the plaque, I couldn’t have the sand create a negative of that void)
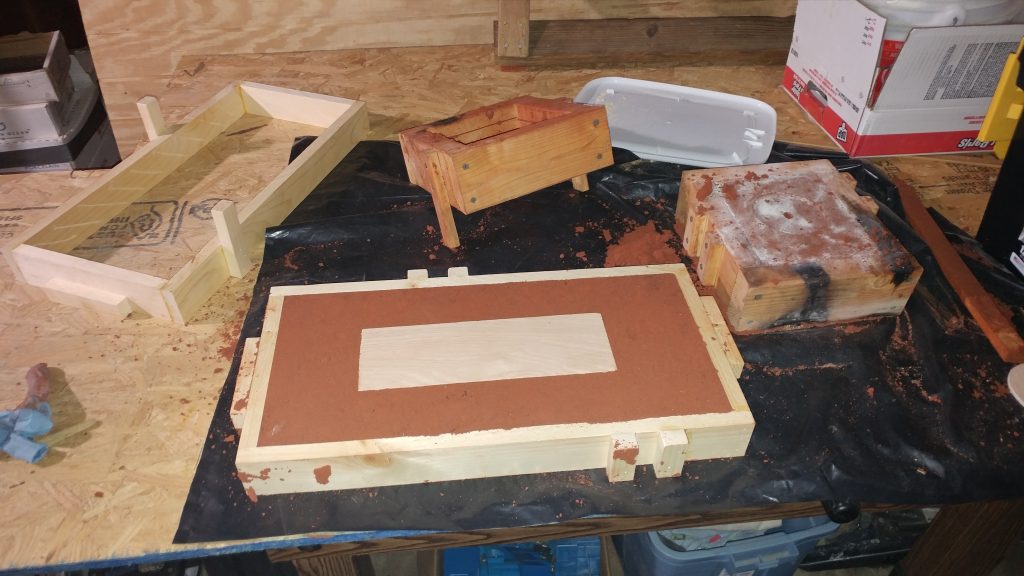
Next, I swapped out the “blank” piece of wood for the text-engraved piece, and impressed the lettering from the wood cutout into the petrobond. I also carved a riser and a very simple gate system for the molten metal to flow.
Since molten metal will shrink 6-12% while cooling, it is important to have a “reservoir” of still-hot molten metal to back-flow into the important pieces of your casting: this allows you to control where the shrinkage will occur: in the riser and sprue, instead of in your part.
After getting the flask all-set, I heated my plaque up on top of my kerosene heater for a few hours to dry-out any trapped moisture. Trapped moisture is very dangerous in a molten-metal scenario, as it vaporizes instantly into steam and expands rapidly in volume and can cause explosions, so I was cautious to avoid this scenario.
Finally, I put the top back on the flask, and pored the metal. Unfortunately, I didn’t capture any photographs of the closed-and-finished flask, nor of the actual pour. Almost immediately as I was pouring the metal, smoke began flowing from the vent holes and from the riser hole.
After pouring, I let the metal cool covered in the flask for a few minutes. This elapsed “cooling time” may have been my project-ending mistake. When I finally removed the cope from my flask, I was dismayed at the havoc the molten metal wreaked on the oak plank

The metal stuck together nicely, and carried a faint image of the previously well-defined text; however, the thin section of wood was completely burnt beyond salvage.

I could kind of tell where the original text was lined up with the remaining slim sections of red and blue wood
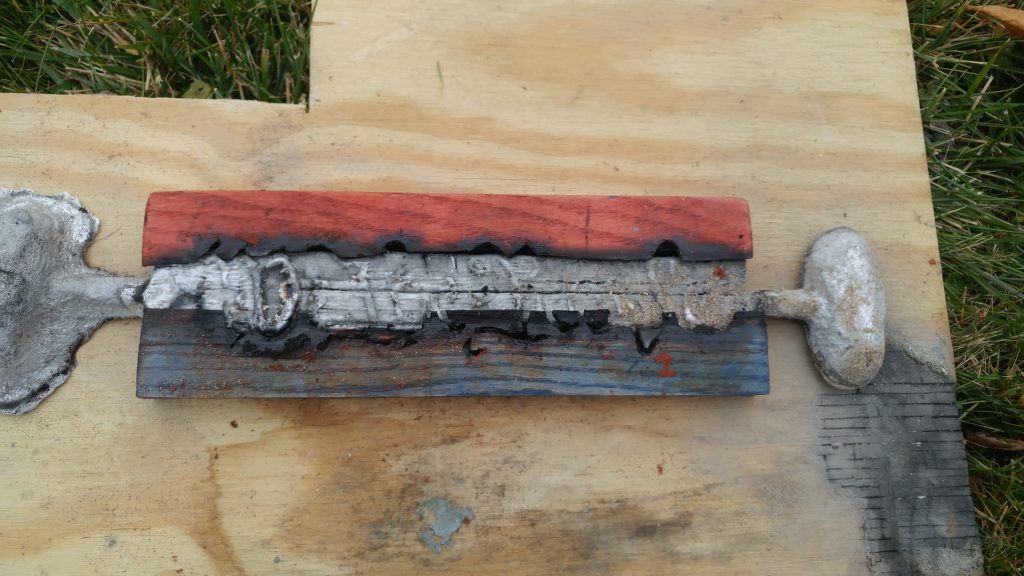
Unfortunately, there’s no saving this project.
If I ever decide to mix metal and wood again, I’ll be sure to take away a few lessons/thoughts from this project:
- Thinner wood sections burn faster
- Oak isn’t the most flame-resistant wood available (check out cedar or epe, or manufactured materials)
- Limit exposure time of metal to wood; maybe pour into an open-topped drag and dunk the compound piece into cooling water as soon as the metal solidifies
- The charred color against the stain sections actually looks decent
- Use the right tools from the beginning (Dremel, not coping saw)
- Try “riskier” actions on a small-sample before investing a lot of time in the final piece